Quick start: create and start a device#
This quick tutorial will guide you to some fundamental TANGO concepts and how to do the first steps.
Step 1: Create a device class#
Start by creating a new device class using the Pogo code generator named TangoQuickStart. See how to create a device class.
Note that in order to compile the class properly, you will also need to add the packaging. Into Pogo, go to File -> Export Package and check all the headers:
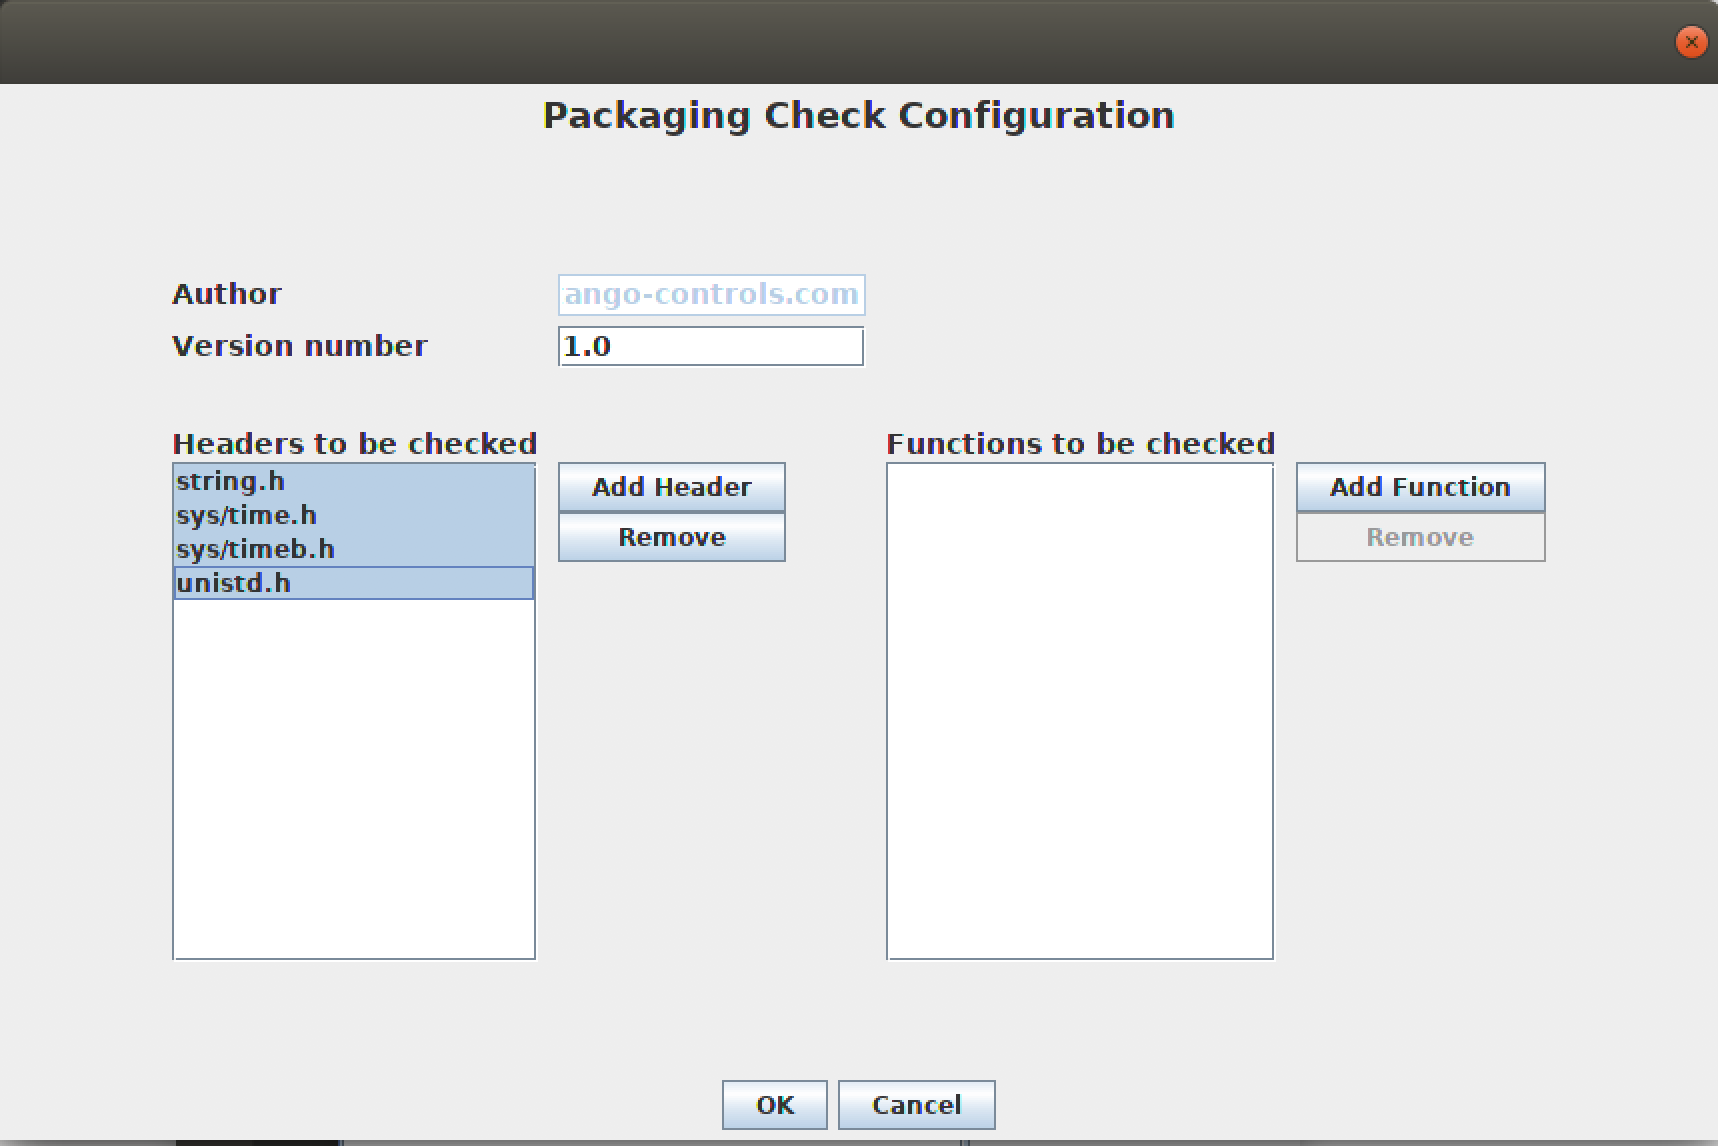
Pogo will then create a new folder with the packages.
Once you have created a skeleton and added the headers, you can add your own code into the class and compile it. Further information on how to implement a C++ device class is available here.
Step 2: Compile the device class#
To compile the files, go to the folder that you choose to store your class and execute the following command:
cd packaging
./autogen.sh
./configure --prefix=$HOME/packaging
make
make install
If everything works, you will see the files in the src directory. In this example we used Pogo to create a class named TangoQuickStart and so we will see the following files:

Step 3: Register the device#
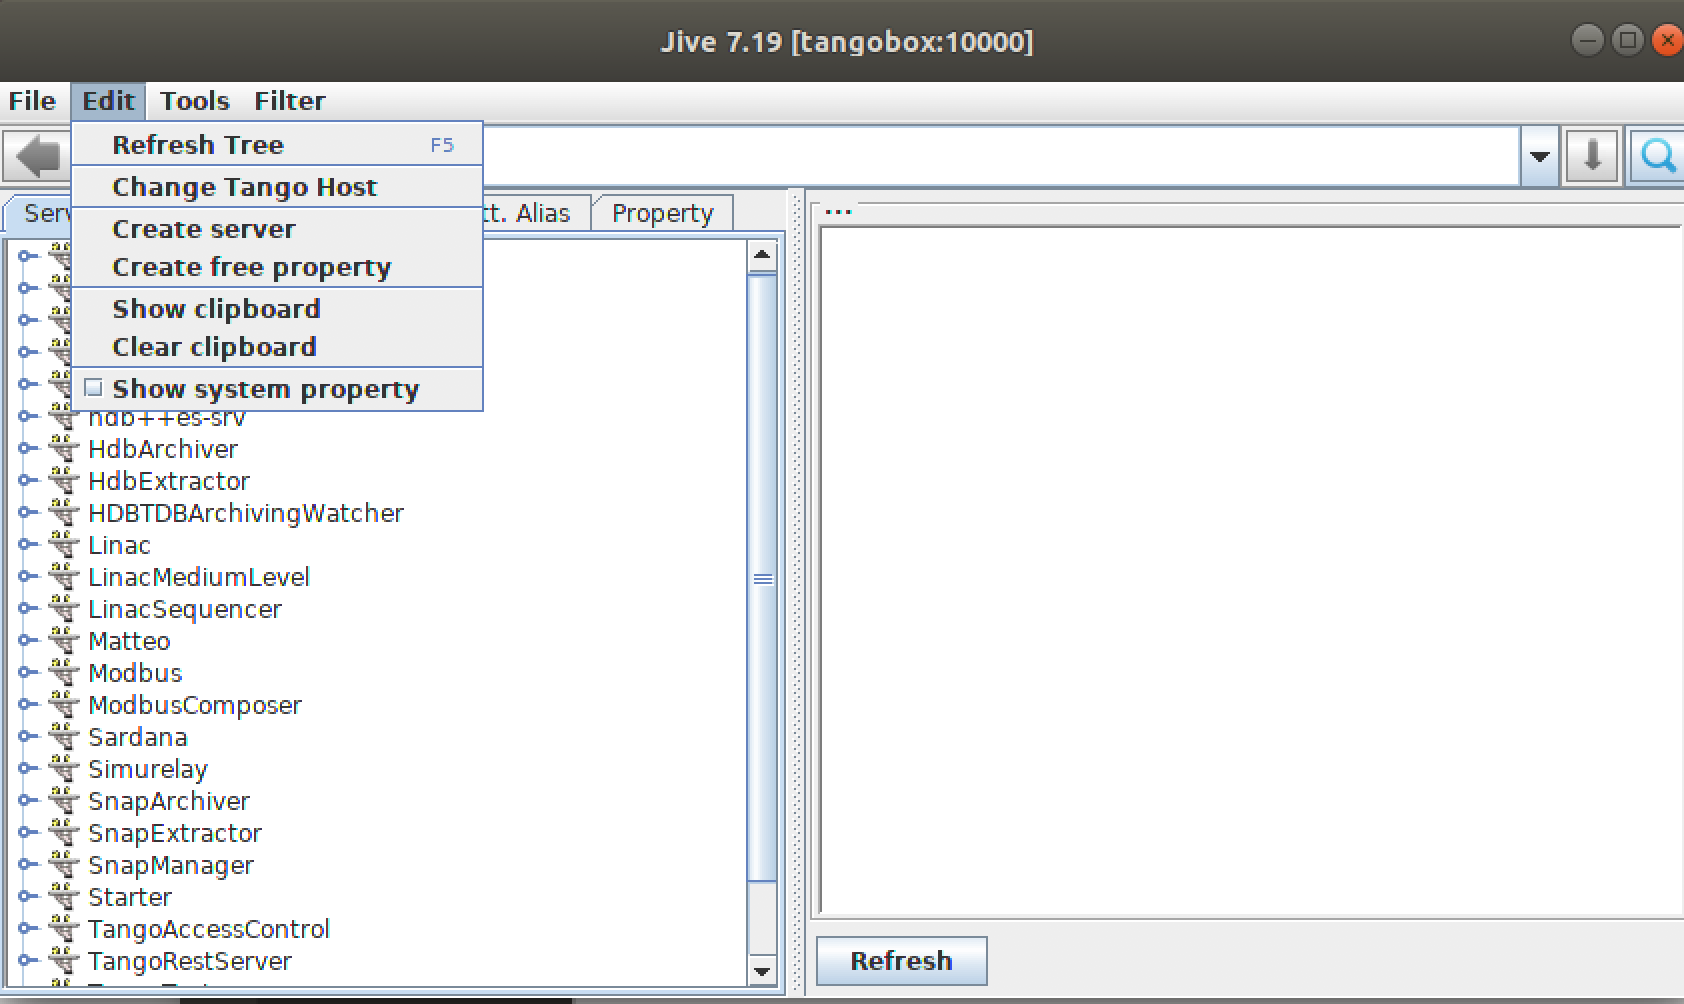
Open Jive and go to Edit -> Create Server
Fill out the form as follow:
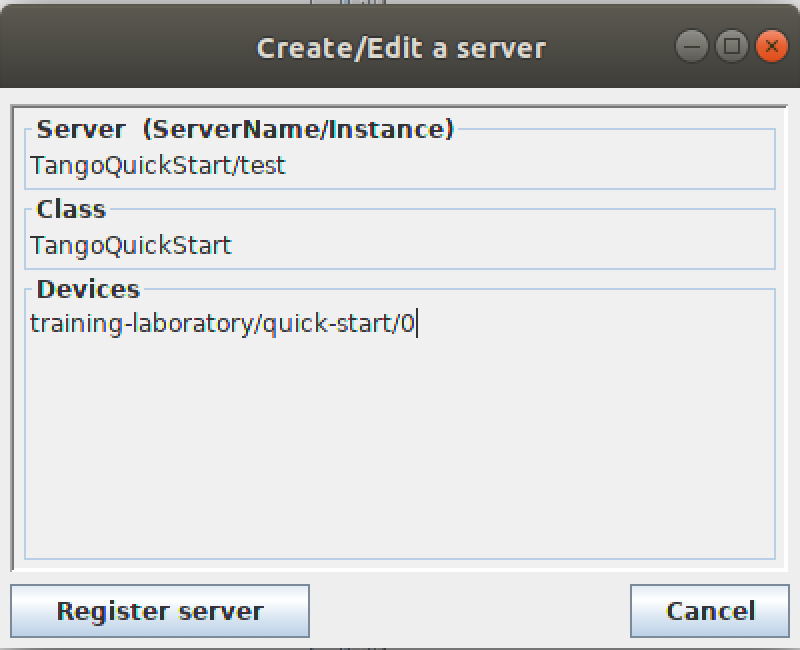
The Server field must contain the ServerName (i.e. the name of the Device Server) and the instance. The Class field must contain the correct class name (in this case TangoQuickStart) and in the Device field you can add one or more devices following the naming convention: domain/family/member.
Finally click Register server.
Step 4: Start the device#
In order to start the device using the command line navigate to the directory where you compiled your C++ class, e.g.
cd packaging/src/
and use the command with the following syntax:
<TangoClassName> <instance>
Where <TangoClassName> is the name of the class that you created (in this example TangoQuickStart) and the instance is the name of the instance register in the Tango database (in this example test). So for this example the command would be:
TangoQuickStart test
If everything is ok, the following message appears:
Ready to accept request
E.g.

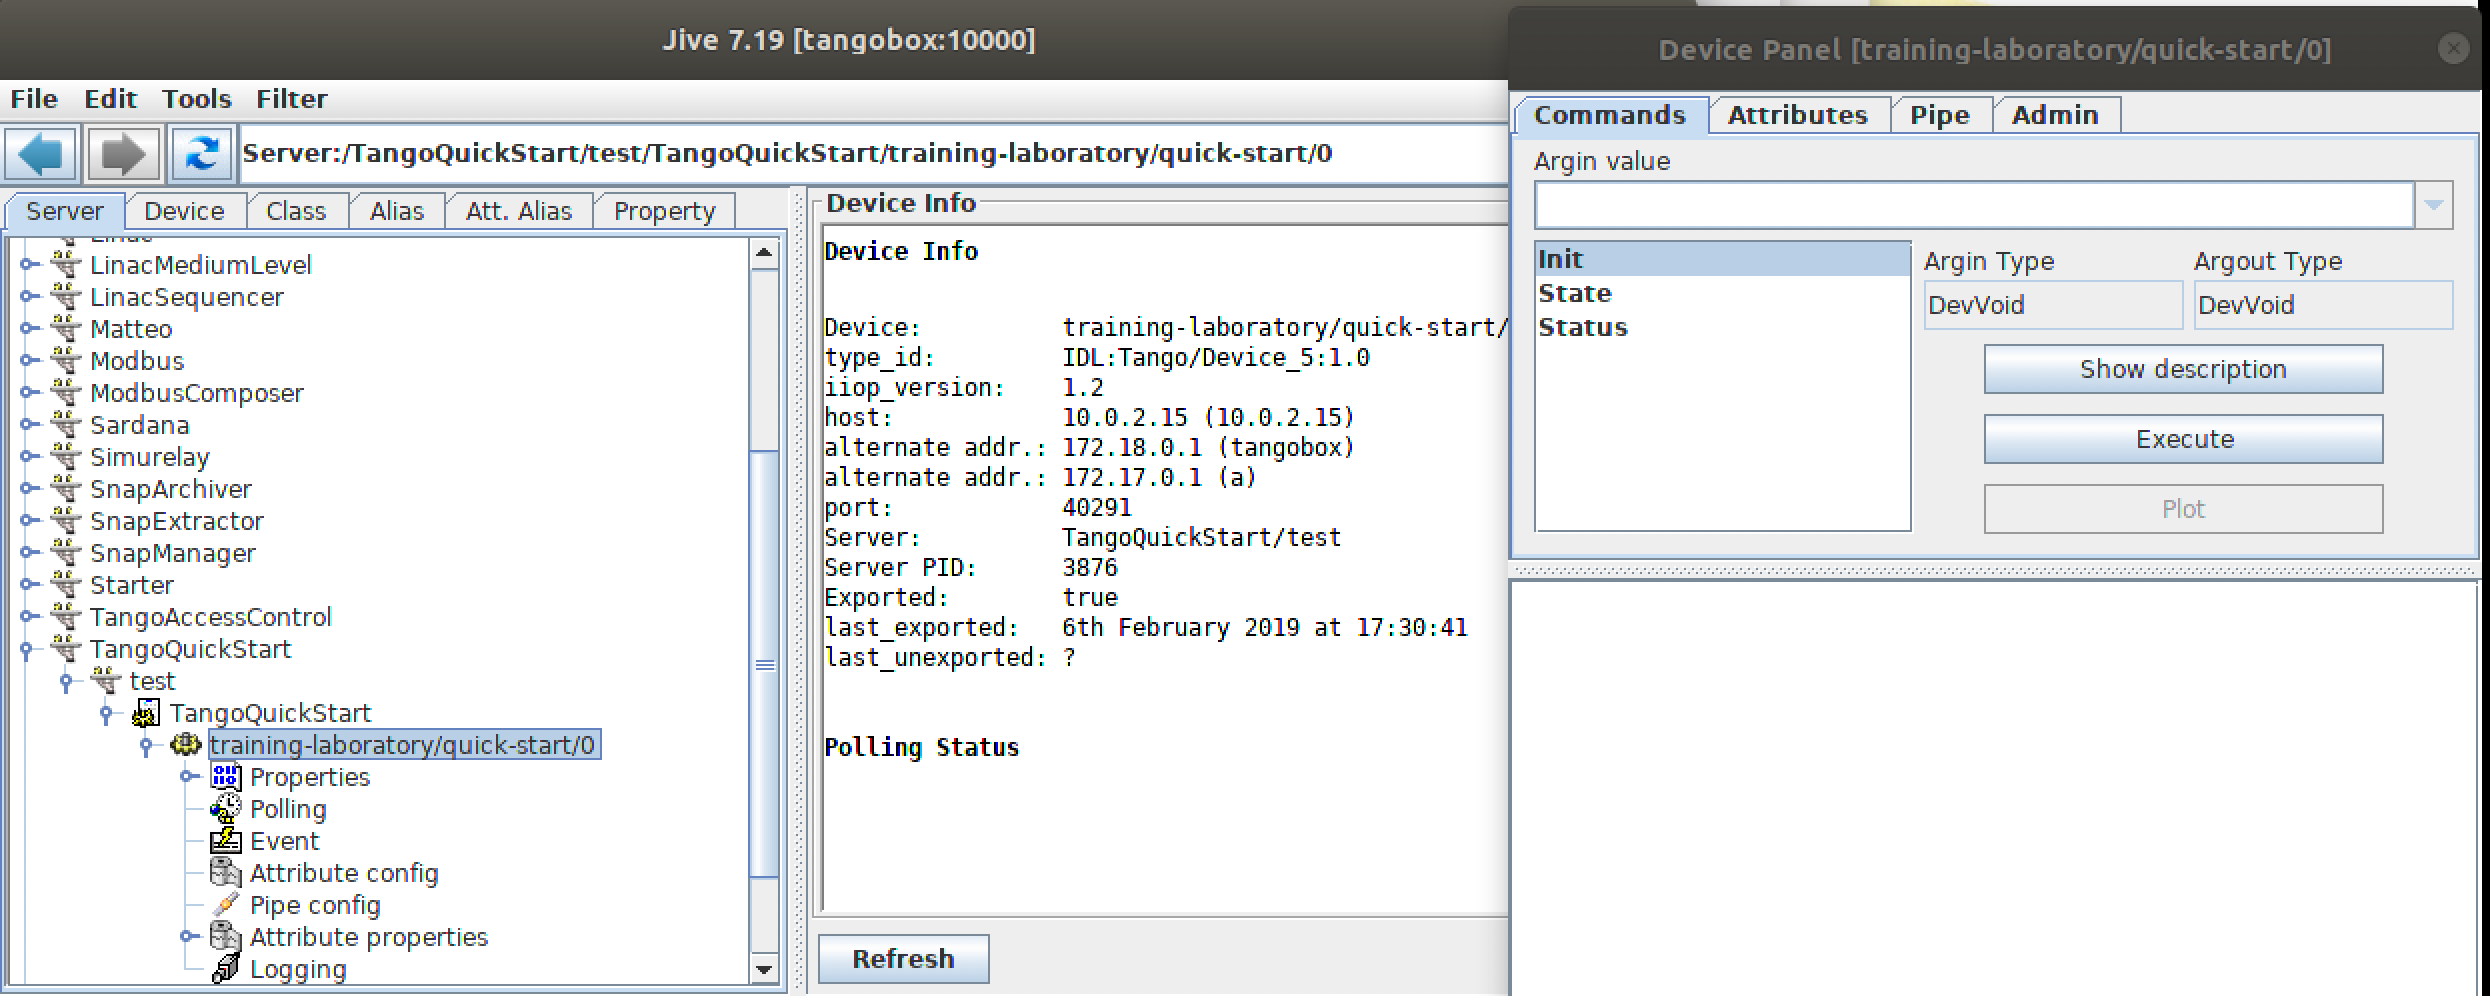
Step 5: explore the device#
When finish, you can explore your device using Jive.