Alarm Indicator
This widget enables the user to view alarm(s) and send a command with parameters to the alarm device
Setting up alarms
If you have setup the alarms then you can skip this section.
Once we have alarm device ready, we can configure alarm to this devices from device tab. We are using alarmSimulator attribute from test/tarantatestdevice/1 device configure low, medium & high priority alarms.
In table below we are configuring 3 alarms:
Low priority alarm which will be triggered if the alarmSimulator value is between 0 & 1
Medium priority alarm which will be triggered if the alarmSimulator value is between 2 & 3
High priority alarm which will be triggered if the alarmSimulator value is 4
Alarm Priority |
Tag value (Argument to use in load command) |
|---|---|
Log / Low Alarm |
tag=taranta_logAlarm;formula=((test/tarantatestdevice/1/alarmSimulator >= 0) && (test/tarantatestdevice/1/alarmSimulator < 2));priority=log;message=”alarmSimulator log event” |
Warning / Medium Alarm |
tag=taranta_warningAlarm;formula=((test/tarantatestdevice/1/alarmSimulator >= 2) && (test/tarantatestdevice/1/alarmSimulator < 4));priority=warning;message=”alarmSimulator warning event” |
Fault / High Alarm |
tag=taranta_faultAlarm;formula=(test/tarantatestdevice/1/alarmSimulator == 4);priority=fault;message=”alarmSimulator fault event” |
This is just an example, we can configure alarms according to our needs.
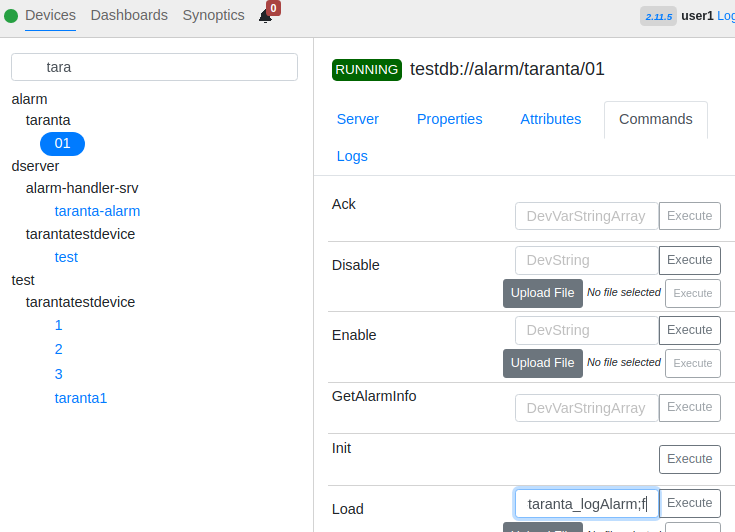
For eg. In below figure we are creating log alarm by executing load command with argument from above table.
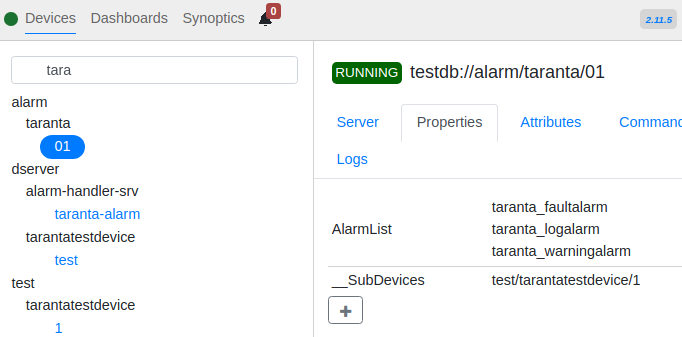
Once all alarms are created, the same can be seen under properties > AlarmList tab
For eg. In the figure below we have created taranta_logalarm, taranta_warningalarm, taranta_faultalarm.
Based on our needs we can also remove the alarms using the remove command by providing the alarm name (taranta_logalarm in our case).
Widget setting
The following image shows an example of a widget setting.
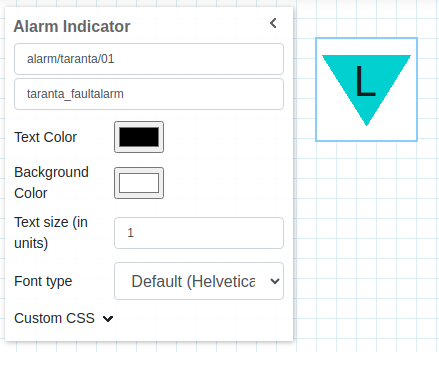
It is possible to customize the widget settings from the inspector panel (in edit mode), as shown below:
Input value |
Description |
|---|---|
Device |
Type in a device name (or * to list all devices) |
Attribute |
Once a device is selected, type in an attribute name (or * to list all available attributes) |
Text Color |
Specify the text color for the given widget |
Background Color |
Specify the background color for the given widget |
Text Size |
1 corresponds to 1em text size |
Font Type |
Choose a font family. Either the default or Monospaced |
Custom CSS |
Write custom CSS for the widget container. The syntax is the same as standard CSS used in HTML files |
Widget configuration
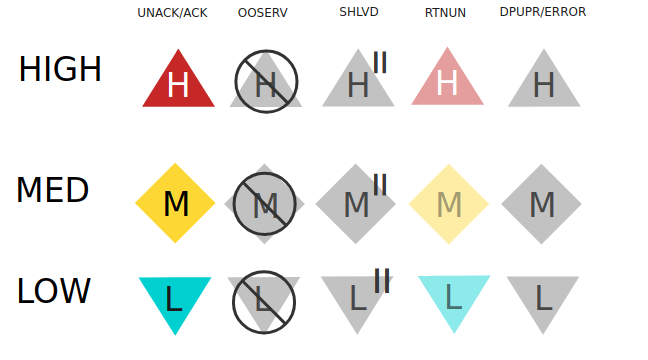
Before starting to use the Alarm Indicator it’s important to know which SVG icon will represent the alarm priority and status. A matrix representing this is shown below.
For eg. The SVG icon at 0,0 position in the matrix will appear for the alarm with high priority and ACK status, similarly the icon at 1,3 position will represent a medium priority alarm which is in RETNUN status.
Note:
The icon will blink when it is in UNACK status. For ACK status, it will remain normal.The icon will fade when it is in RETNUN status.No icon will be shown when the alarm is in normal (NORM) status.
Once you have configured the Alarm Indicator by selecting an alarm device and an attribute, you can hit run button to view the real time alarm status. The widget will render a SVG icon to represent alarm priority and status, this will change based on the alarm values (priority & status). In figure below, we have configured Alarm Indicator with device alarm/taranta/01 and attribute taranta_logalarm.
In the image below, we can see a low priority alarm that is in RETNUN status. The SVG icon is faded because it’s in RETNUN status.
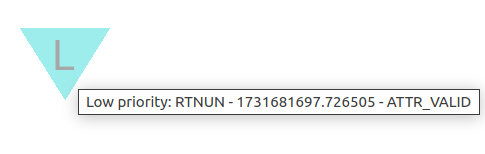
Note: By hovering over the SVG icon, you can view the alarm's priority, status, timestamp and attribute validity.
Changing Alarm Status
We can either use jive or command widget from the dashboard to change the status of an alarm.
For eg. In the image below, we have configure a command widget with the alarm device alarm/taranta/01 to execute the ACK command.
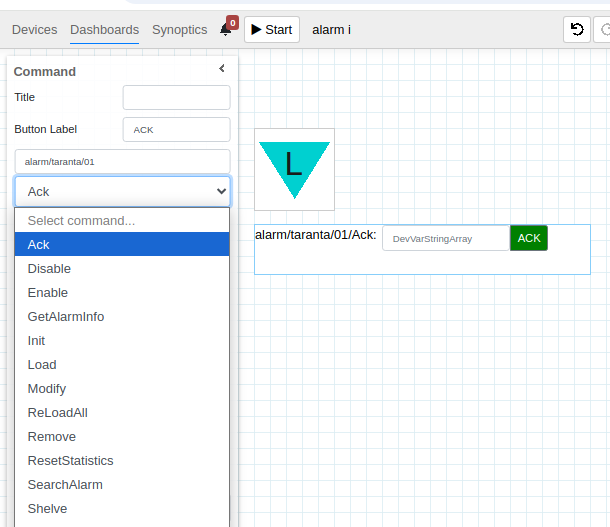
As shown in figure below, once alarm is in UNACK status, we can execute the ACK command after which alarm status changes to NORM (No icon shown). The input value for the command is the alarm name (taranta_logalarm) which we used to configure the Alarm Indicator widget.

Similarly, we can also configure the command widget to disable (OOSRV), enable, or shelve the alarm.