Bensikin User Manual
Intended audience: users, administrators
Authors:
R.Girardot, M.Ounsy, A.Buteau, M.Thiam - Soleil
Introduction
This document is an end-user guide to using the Bensikin application, and a brief developer-oriented presentation of the application’s architecture.
Application’s context: Contexts and Snapshots
A snapshot is, as said in the name, a “picture” of a list of equipment’s “settings” (more precisely of their Tango attributes values) taken at a precise instant.
A snapshot is based on a context, which is a group of Tango devices and their attributes that must be part of the snapshots. A context is described by meta-data (author, description, etc.), so that users know which context is used what for.
A typical use case of a snapshot is to memorize a particular configuration of a set of equipment’s, to be able in the future to reset them to the values of this snapshot (for example, reposition all Insertion devices to their parking position after a beam loss).
Application’s description and goals
Application’s goals
Bensikin allows the user to define contexts and take snapshots. Snapshots can be saved as files and modified.
Bensikin is ready for multi-user use, which has for consequence the need to define accounts. An account is a way to map a user with a working directory. An important consequence of this is that 2 different users must not use the same working directory, or you may encounter application misbehaviors. An account has a name and a path to a working directory.
Bensikin is thus naturally divided (both in functionalities and display) in three parts:
- The account part, which is an introduction to the rest of the
- application
- The context part
- The snapshot part
A first look to Bensikin
The Bensikin Account Manager is here to manage accounts, which means:
Creating a new account
Deleting an existing account
Launching application with an account chosen in a list
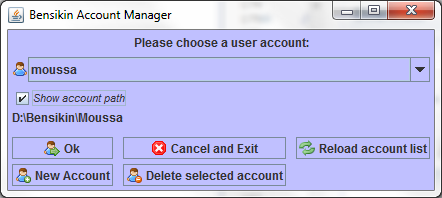
Figure 1: Bensikin Account Manager
The Context Control Panel is where user can manage contexts, which means creating, loading and modifying contexts, and launching snapshots based on the defined contexts.
The Snapshot Control Panel is where user can manage snapshots, which means saving snapshots in files, loading snapshots from database and files, temporary modify snapshots attributes values and set equipment with defined snapshots (with or without modifying snapshots) or a subpart of them.
The application’s logs panel displays the application information and error messages (like database interaction, encountered problems, etc.)
The Menu and the Tool bar are for actions shortcuts and application’s options.
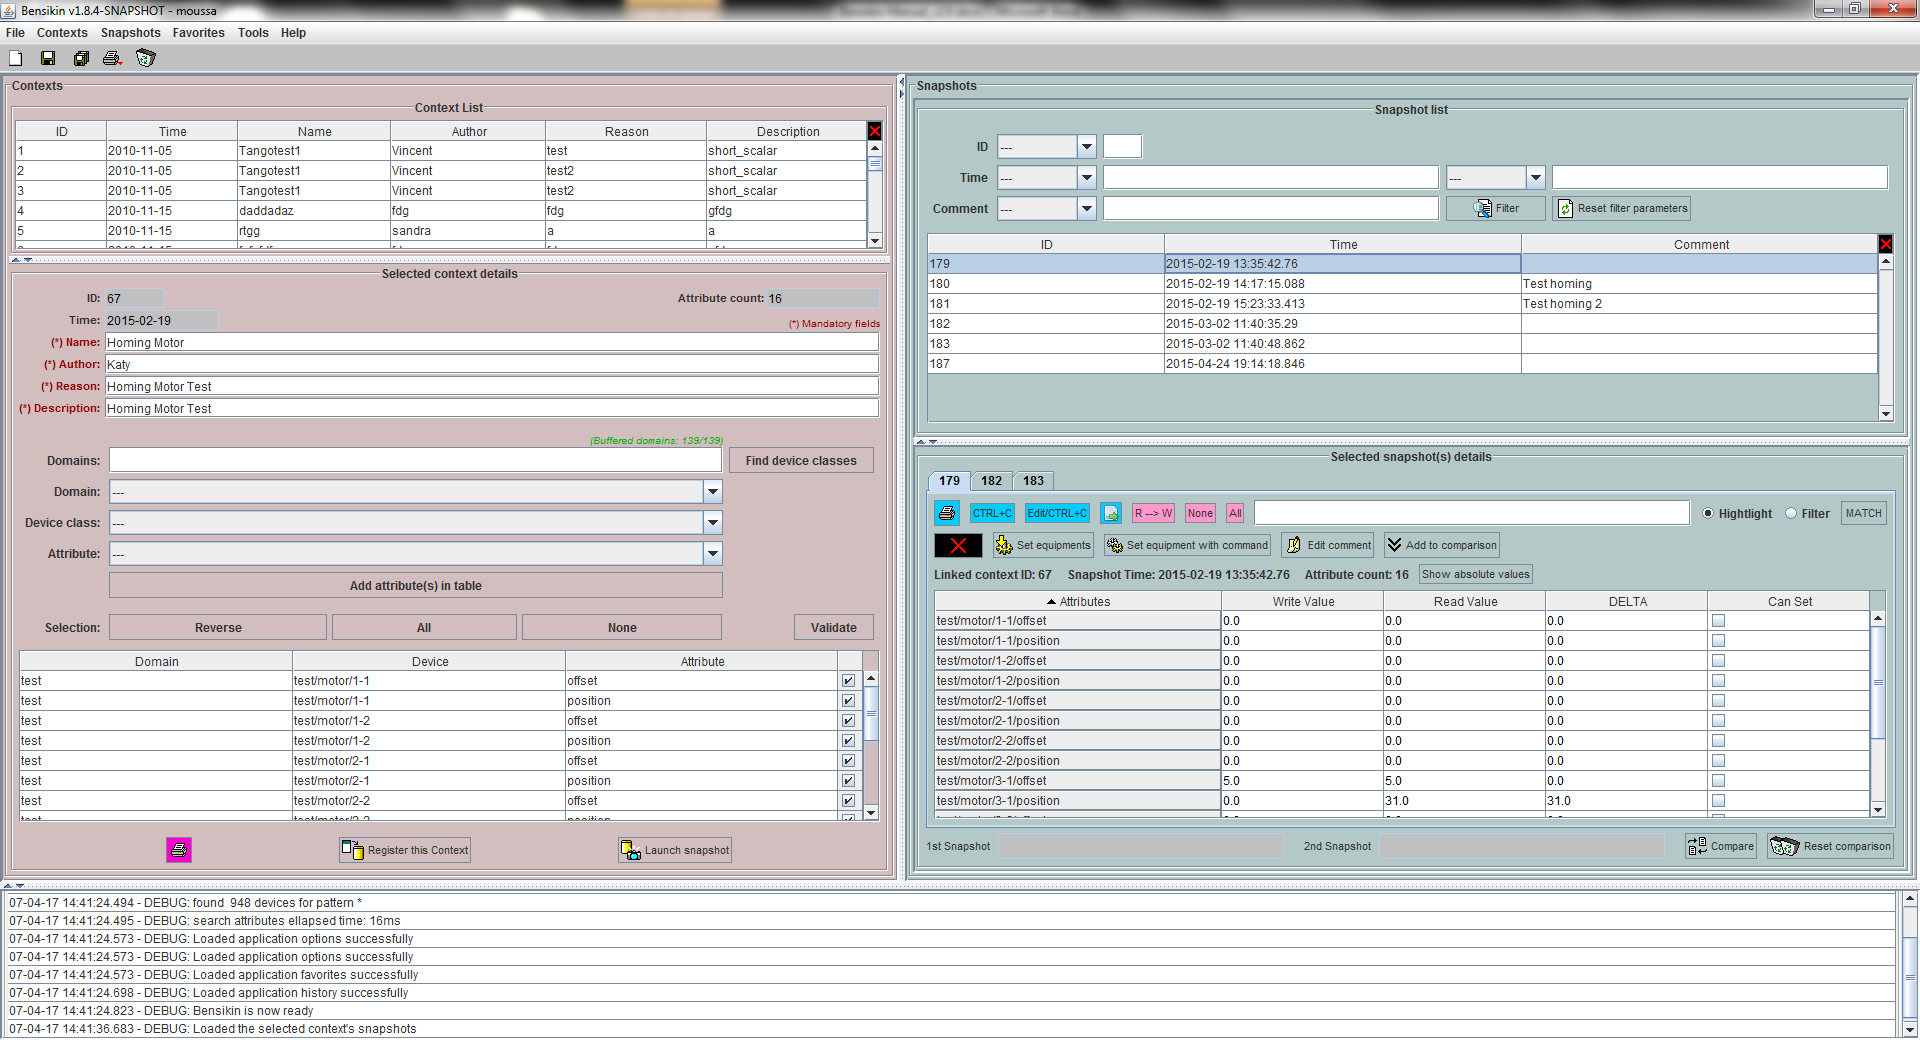
Figure 2: Bensikin main panel
Account Manager
The Figure 1: Bensikin Account Manager presents the account Manager Interface, on application start. With this manager, you can create a new account, or delete or use an existing one.
To quit the application, simply click on  or
or 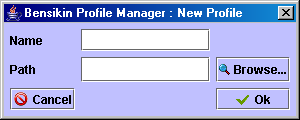 button.
Existing accounts are listed in the account Selection Combo Box, which
you can reload by clicking on  button (if you think that someone
could have modified it by creating a new account or deleting an existing
one, for example).
button (if you think that someone
could have modified it by creating a new account or deleting an existing
one, for example).
Creating a new account
To create a new account, click on the button 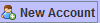 (at the bottom
left of the panel). A new dialog will appear, as following.
(at the bottom
left of the panel). A new dialog will appear, as following.
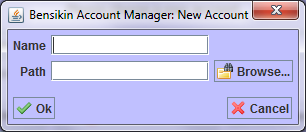
Figure 3: Creating a new account
In this new dialog, you will have to enter the name of your new
account and the path of the application working directory for this
account. If you prefer, you can browse for the path by clicking on
the  button. Then, a classic browsing dialog will be
displayed, in which you can choose the directory. When both fields
(Name and Path) are fulfilled, click on
button. Then, a classic browsing dialog will be
displayed, in which you can choose the directory. When both fields
(Name and Path) are fulfilled, click on  button to
validate your new account, which will be automatically added in the
list of existing accounts. If you click on
button to
validate your new account, which will be automatically added in the
list of existing accounts. If you click on  or
button, you go back to the first dialog, as presented in
Figure 1: Bensikin Account Manager,
and nothing is done.
or
button, you go back to the first dialog, as presented in
Figure 1: Bensikin Account Manager,
and nothing is done.
Deleting an existing Account
To delete an existing account, first select the account in the account selection combo box, as following:
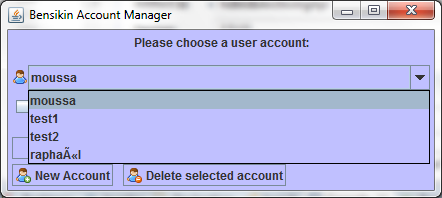
Figure 4: Account selection
When the account is selected, click on Delete button to delete it. If you do it, you won’t be able to use this account any more (and no other user either), because the account is definitely removed from list. The account deletion doesn’t involve the corresponding directory (neither its content) deletion.
If you want to see your account path, you can check Show account path.
Figure 5: Show account path
Launching application with an existing account
To launch application with an existing account, first select the account in the account selection combo box, as presented in Figure 4: Account selection.
Then, click on Ok button, and you will reach the application main panel configured with this account (the account name is displayed in frame title).
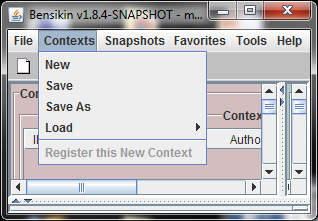
Contexts Management
This section describes how to control contexts with Bensikin. A context is a list of attributes for which you can make a snapshot. A context has an ID and a creation date, both defined by the database. A context also has a name, an author, a reason and a description. The reason usually describes why the context was created (example: because of an incident or in order to set some equipment), whereas the description is here to have an idea of what kind of attributes you will find in this context.
Contexts are managed in the context control panel:
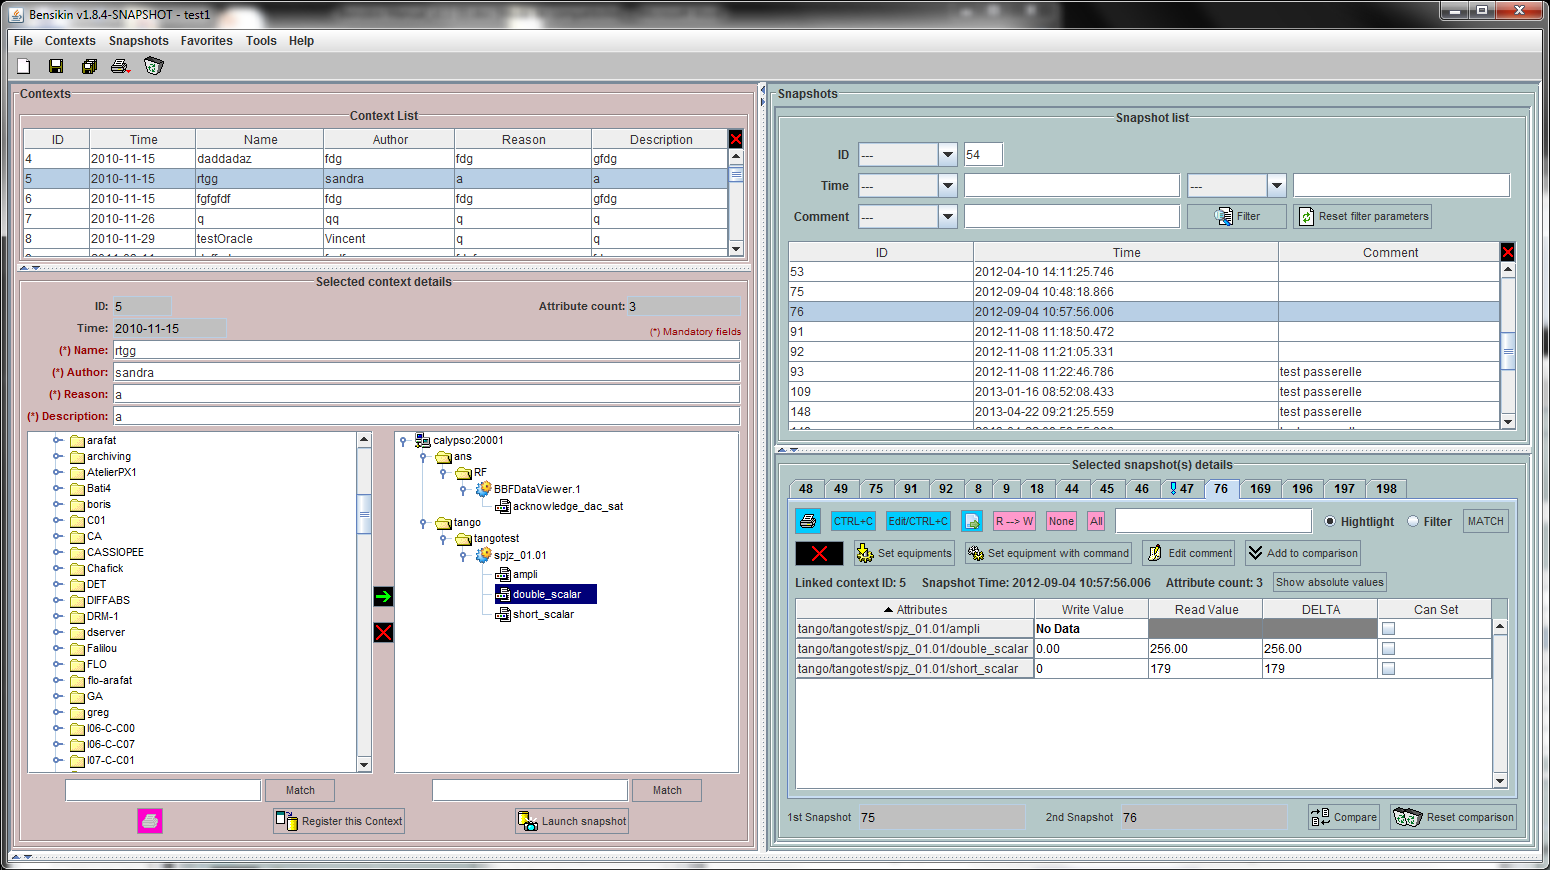
Figure 6: Context control panel
Creating a new context
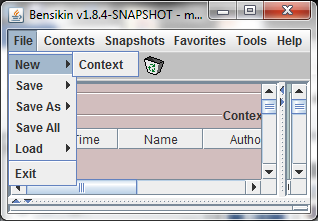
To create a new context, click on the new icon in toolbar
( ), or choose option to make a new context from File menu
or Contexts menu:
), or choose option to make a new context from File menu
or Contexts menu:
You also are ready to make a new context at application first start
or by clicking on the reset icon ( ):
):
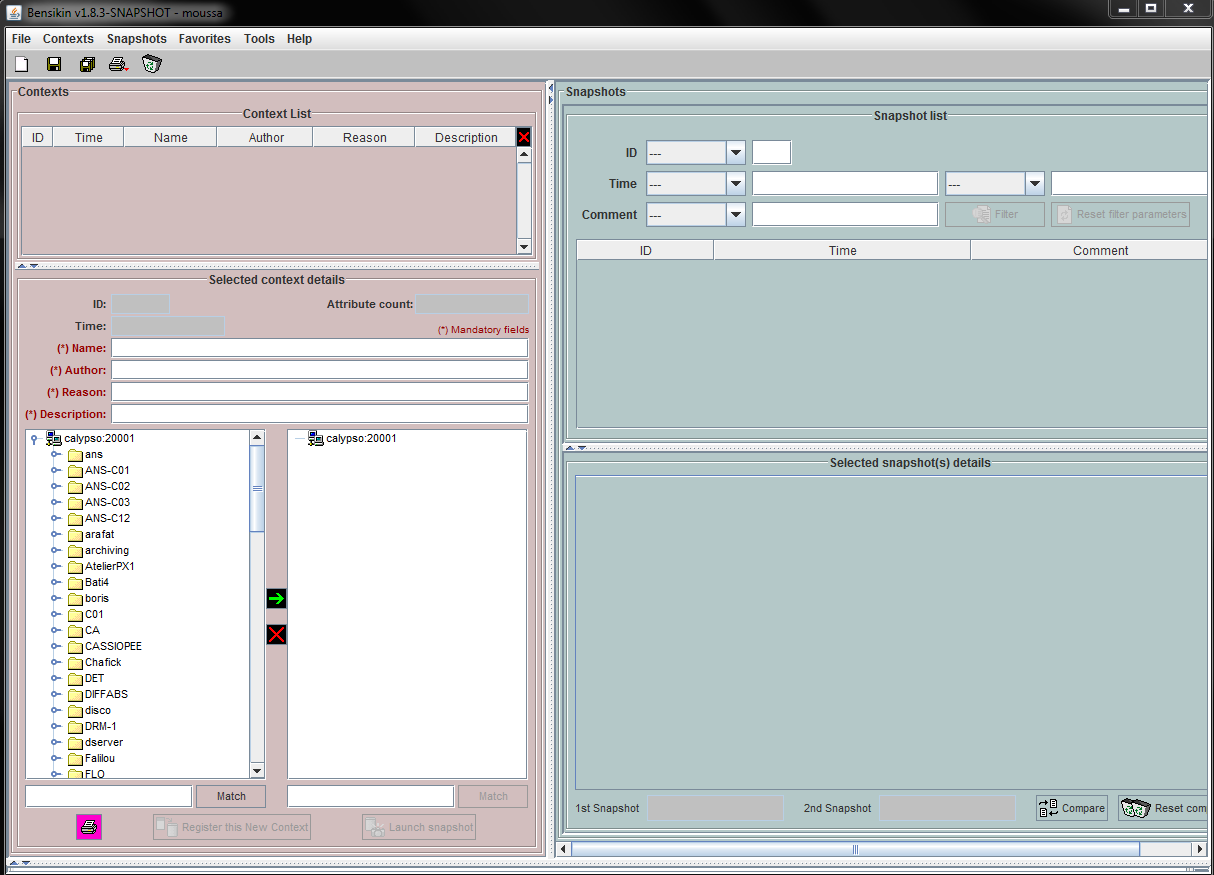
Figure 7: Application first start
The difference between the reset icon() and the new
icon() is, that the “reset” icon will clear every panel,
whereas the “new” icon will only clear the snapshot list and the
Context Details sub panel.
Classic way (tree)
The tree on the left side of the Context Details sub panel allows you to check for available attributes. The one on the right side represents your context attributes.
To add attributes in your context browse the left tree, select
attributes (represented by the icon  ), and click on the
arrow
), and click on the
arrow 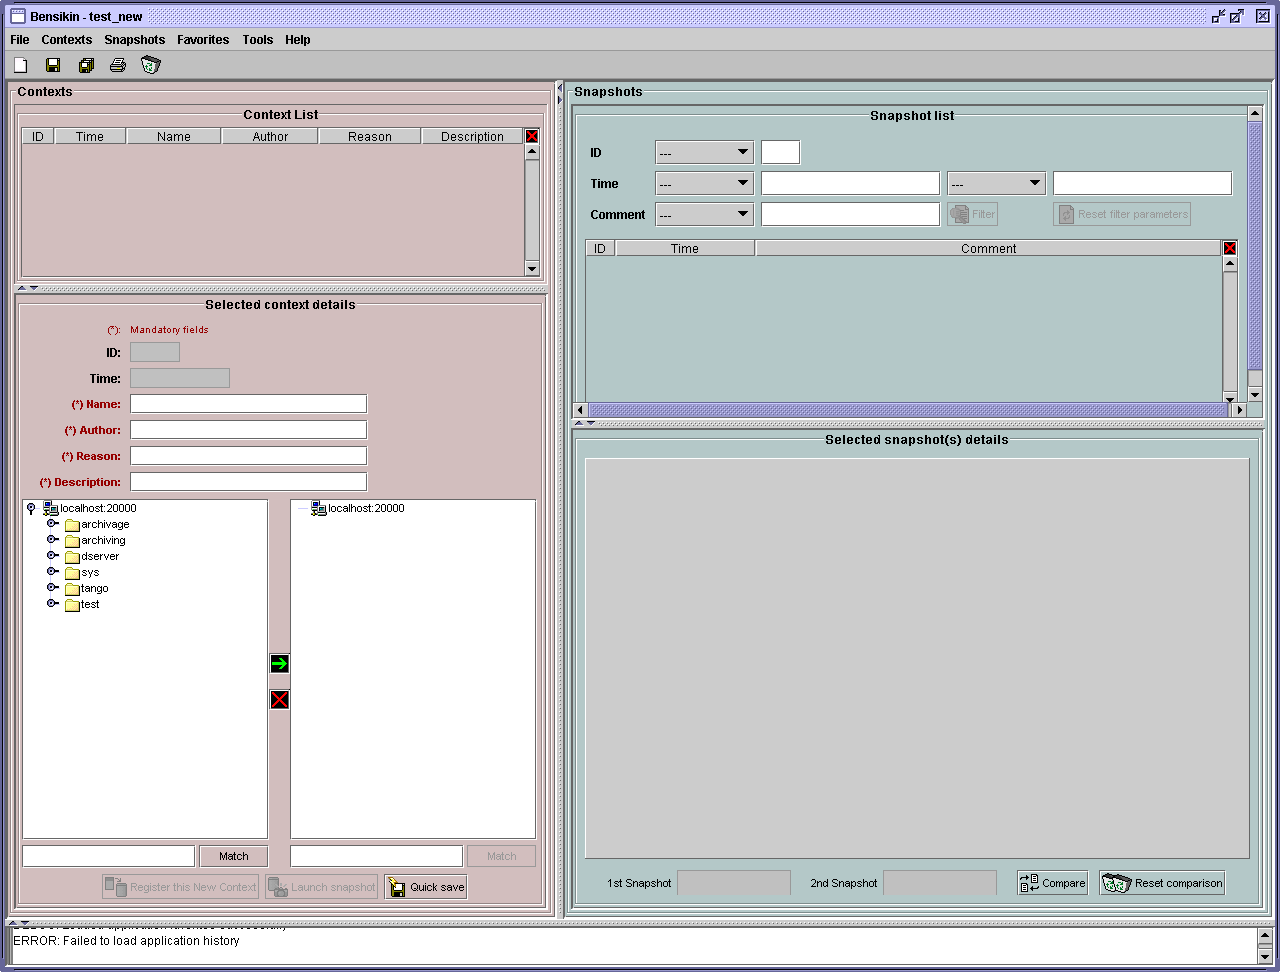 to transfer them to the right tree.
To remove attributes from your context, select them in the right
tree and click on the cross .
Finally, fill the context Meta data (Name, Author, Reason and
Description) in the corresponding fields (Note that filling the
fields activates the register button 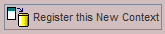 ).
).
Then, you can save your context in database by clicking on the
register button .
Doing so will deactivate the register button and activate the
launch snapshot button 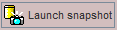 .
.
You can save your context in a file using the save
icon  .
.
Alternate way (table)
To select this alternate way, go to tools menu and select options.
Then select the context tab and click on the table radio button.
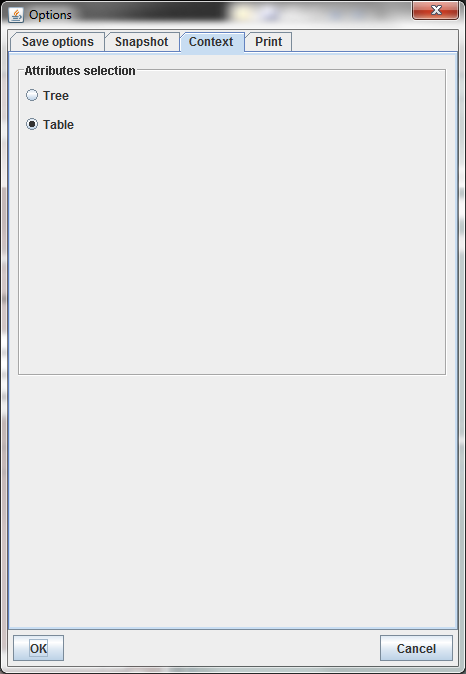
Figure 8: Option –context tab
Click on the ok button. The context panel now has the “table selection mode”.
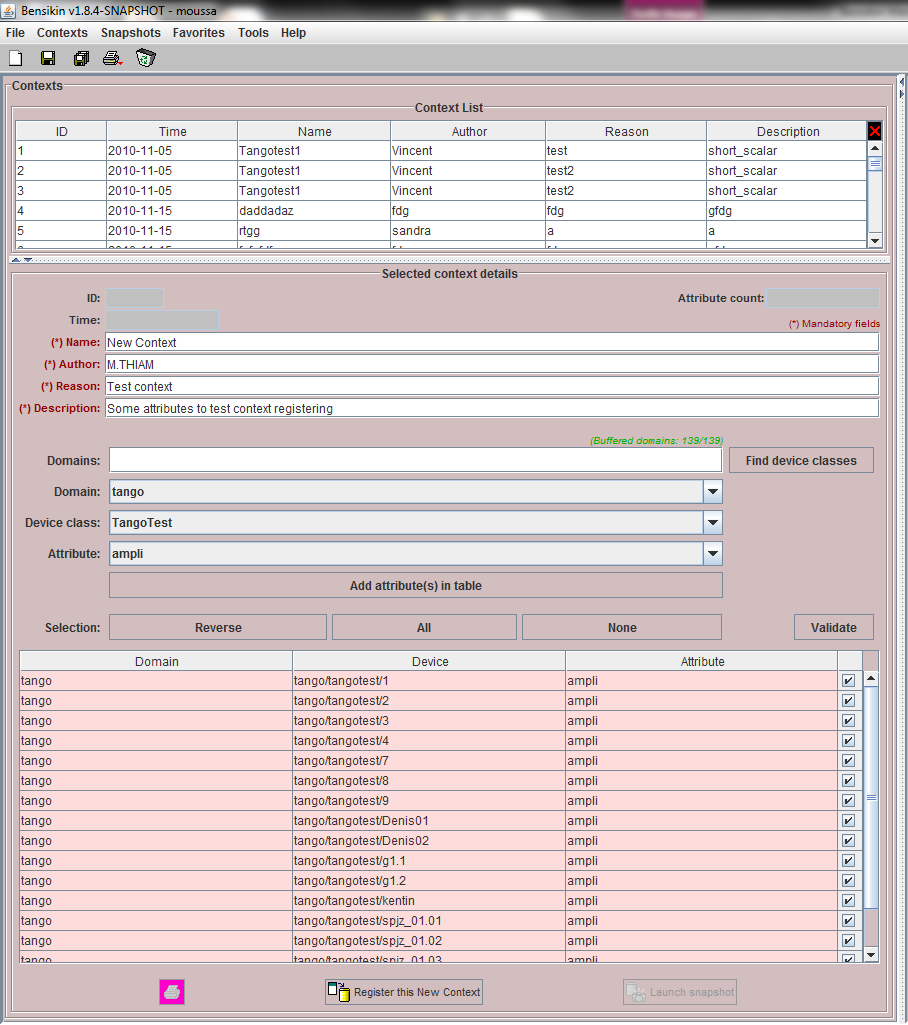
Figure 9: Bensikin with context table selection mode (new context)
Attribute selection and automatic attributes adding:
Choose a Domain. This refreshes the list of possible Device classes for this Domain.
Choose a Device class. This refreshes the list of possible Attributes for this Domain and Device class.
Choose an Attribute and press OK:
All Attributes with the selected name AND belonging to any Device of the selected Class and Domain are added to the current Context’s list of attributes.
All new attributes are light red until the Context is registered.
Line level sub-selection of loaded attributes:
Each attributes are initially checked, but this check can be removed by the user. When the user clicks on validate, all unchecked attributes will be removed from the current Context.
- Click All to select all lines
- Click None to select no lines
- Highlight lines in the list (CTRL and SHIFT are usable), then click Reverse highlighted to reverse the checked/unchecked status of all highlighted lines.
As for the classic way, you will have to fill the Meta data fields
and register your context in database by clicking on the register
button
Modifying an existing context
As a matter of fact, you can’t really “modify” a context. What you can do is to create a new context with its information (attributes and Meta data) based on another one.
The very difference is in alternate mode, where former attributes are in white and new ones in light red:
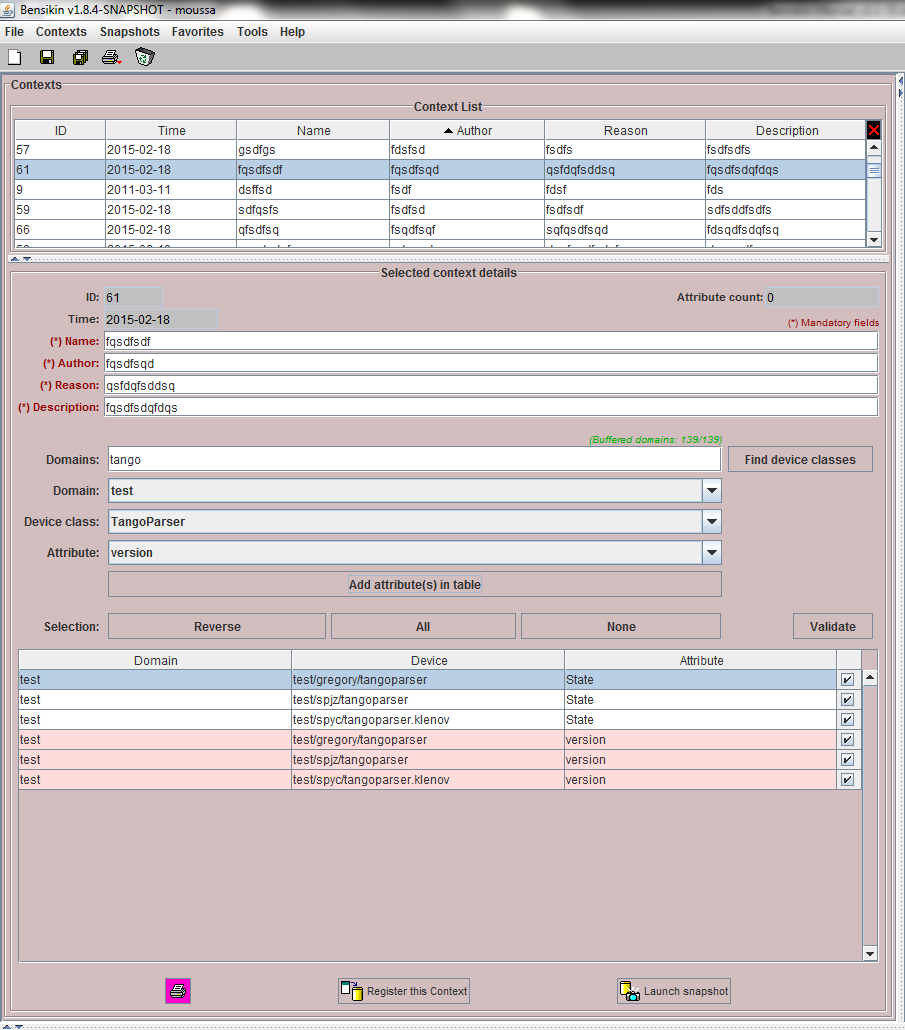
Figure 10: Bensikin with context table selection mode (modified context)
The “register” button changed a little too: its text is Register this context instead of “Register this new context”, as you can see on the figure above.
Loading a context
There are 2 ways to load a context:
- Load it from the database
- Load it from a file
In both cases, loading a context will apply a quick filter on the snapshot list, so you can see the snapshots about this context that have been created this day (the day when you load the context).
Loading a context from database
In the Contexts menu, choose load then select DB:
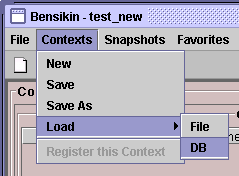
A dialog will then appear to allow you to filter the list of contexts in database following different criteria:
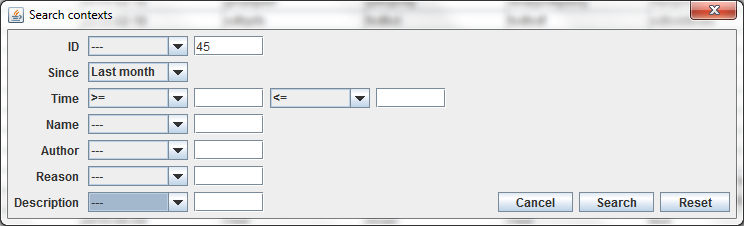
Figure 11: Data base Context filter dialog
Select no criterion to search for all contexts present in database.
Click on the  button to apply the filter. The list of
corresponding contexts will then appear in the Context List sub
panel, as shown in Figure 6: Context control panel. Double click
on a context in table to load it and see its details in the Context
Details sub panel (See Figure 6: Context control panel).
button to apply the filter. The list of
corresponding contexts will then appear in the Context List sub
panel, as shown in Figure 6: Context control panel. Double click
on a context in table to load it and see its details in the Context
Details sub panel (See Figure 6: Context control panel).
If there are too many contexts in the list, you can remove some
contexts from list (not from database) by selecting them in list and
clicking on the cross on the top right corner of the list
( ).
).
Loading a context from file
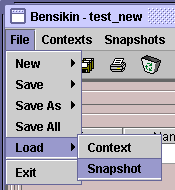
In the Contexts menu, choose load then select File, or in File menu choose load then select Context:
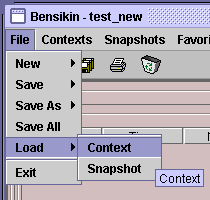

A classic file browser will appear. Search for your “.ctx” file and select it to load the corresponding context in the Context Details sub panel (See Figure 6: Context control panel).
Printing a context
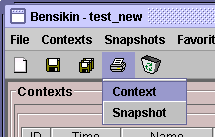
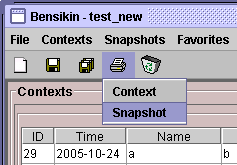
Once you have context ready, click on the print icon ( )
and select context:
)
and select context:
The classic print dialog will then appear. Validate your print configuration to print an xml representation of your context.
User can also print context by pressing the button 
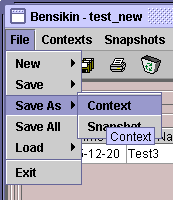
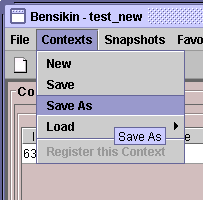
Saving a context
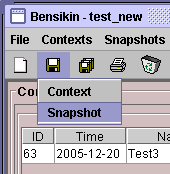
Once you have context ready, click on the save icon ()
and select context:
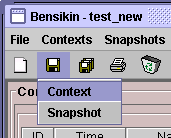
You can also go to menu Contexts and click on save, or go to menu File, select Save and click on Context.
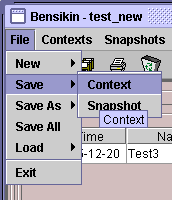
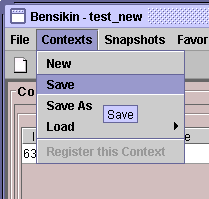
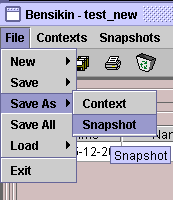
Then, the behavior is “Word-like”. This means that if this is the first time you save this context, you will see the classic file browser to choose where to save your context, with file name. However, else, it will automatically save in the corresponding file. If you want to save in another file, you have to go to File menu, select Save As and click on Context or go to Contexts menu and click on Save As
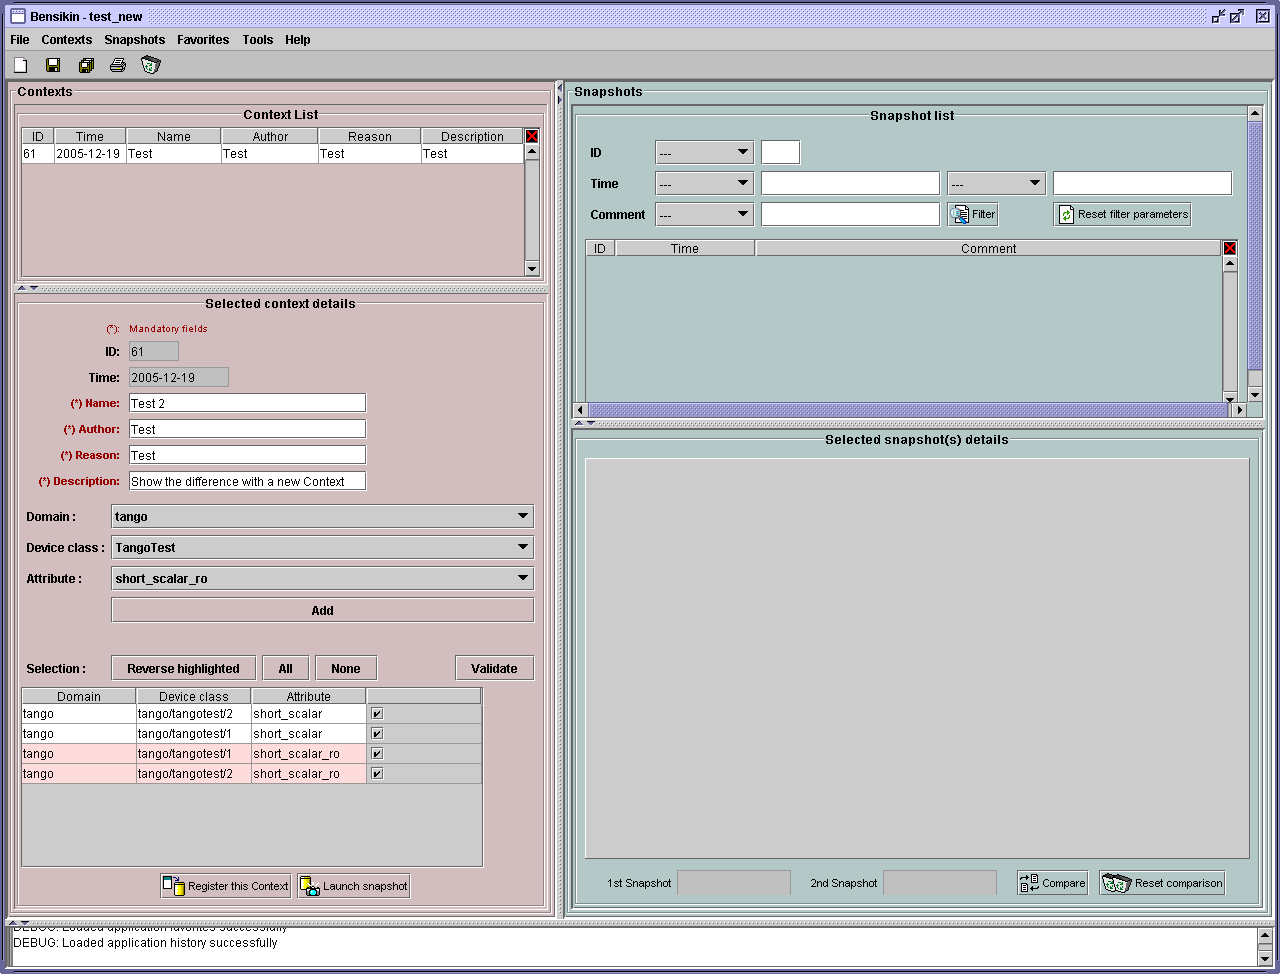
Snapshot Management
This section describes how to control snapshots with Bensikin. A Snapshot is a view of your equipment at a precise date, view based on a context. A Snapshot has an ID, a creation date (Time), and a comment to describe it (which can be left empty).
Snapshots are managed in the snapshot control panel:
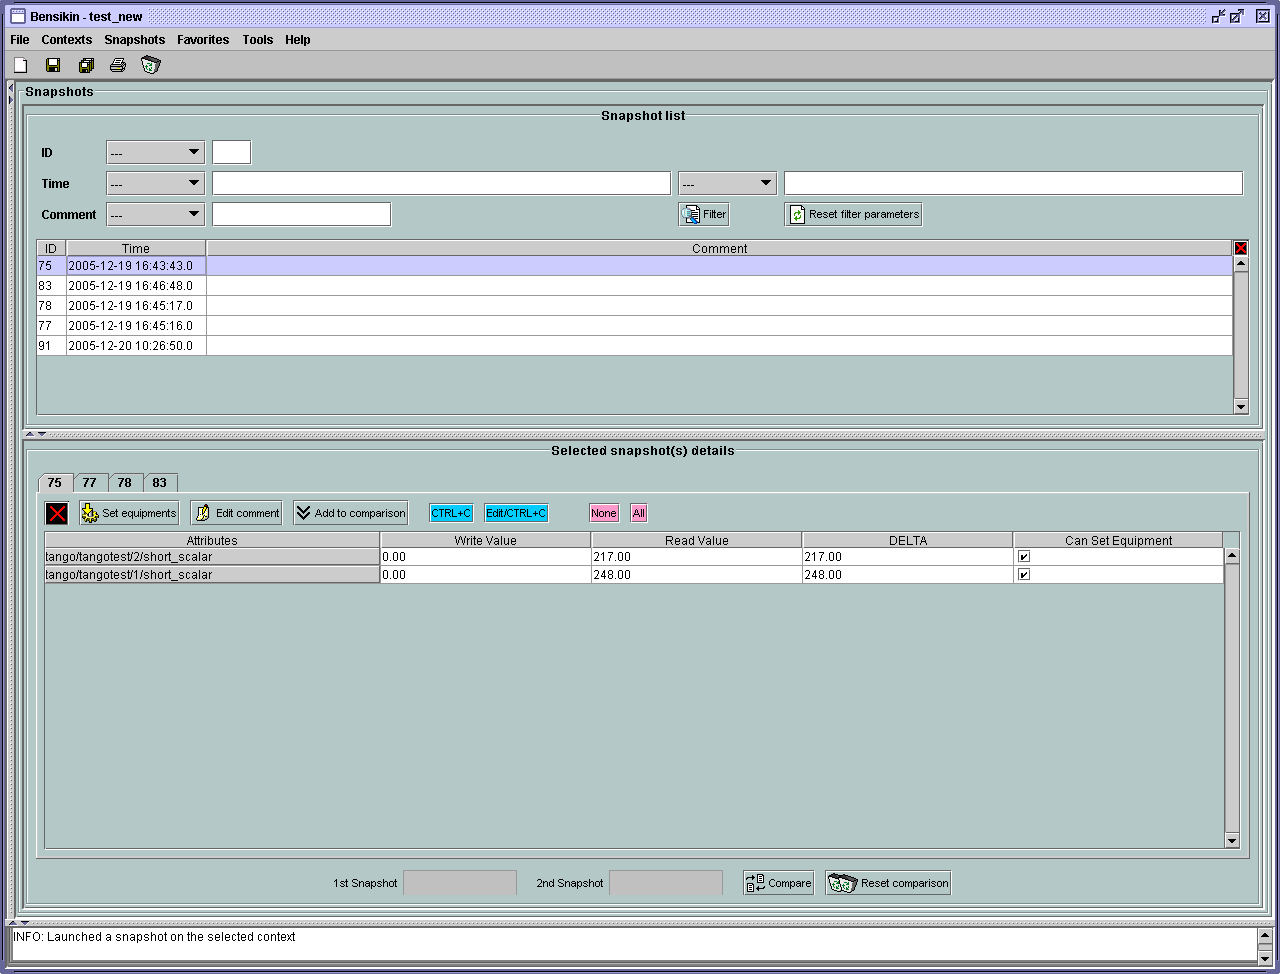
Figure 12: Snapshot control panel
Creating a new snapshot
To create a new snapshot, first select a valid context in the
context control panel (see Figure 6: Context control panel). Then
click on the button  . The corresponding snapshot is added
in the list of snapshots in the Snapshot List sub panel.
. The corresponding snapshot is added
in the list of snapshots in the Snapshot List sub panel.
Loading a snapshot
There are 2 ways to load a snapshot:
- Load it from the database
- Load it from a file
Loading a snapshot from database
Loading a snapshot from database consists in adding this snapshot in the list of snapshots in the Snapshot List sub panel.
As you can see in Figure 12: Snapshot control panel,
the Snapshot List sub panel allows you to filter snapshots from database to find
the snapshot you want to load. However, have in mind that this
filter is “context dependent”, which means that the snapshots which
will appear in the list by clicking on the filter button
( ) are the one that correspond to your filter criteria
AND the selected context in the Context Control Panel. If the
filter is cleared (which you can obtain by clicking on the
button
) are the one that correspond to your filter criteria
AND the selected context in the Context Control Panel. If the
filter is cleared (which you can obtain by clicking on the
button  ), you will search for all the snapshots in
database that correspond to the selected context.
), you will search for all the snapshots in
database that correspond to the selected context.
Loading a snapshot from file
In the Snapshots menu, choose load then select File, or in File menu choose load then select Snapshot:
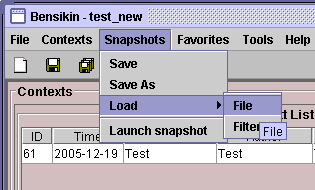
A classic file browser will appear. Search for your “.snap” file and select it to load the corresponding snapshot in the Snapshot Details sub panel (See Figure 12: Snapshot control panel)
Editing a snapshot
To edit a snapshot, double click on the snapshot you want to edit in
the snapshot list (in the Snapshot List sub panel). This will open a
new tab about this snapshot in the Snapshot Details sub panel, tab
named by this snapshot ID. If you load a snapshot from file, the
name of the tab is the name of the file. To differentiate snapshots
loaded from file and the ones loaded from database, the snapshot
loaded from file tabs have the icon  .
.
Setting equipment with a snapshot
A snapshot allows you to set equipment with its attributes write
values. You can choose which attributes will set equipment, and
which not, by selecting or unselecting the corresponding check box
in the column Can Set Equipment
(See Figure 12: Snapshot control panel).
By default, every attribute is selected. If you unselect
some attributes, an icon  will appear in tab title to
notify you that these attributes will not set equipments. You can
quick select/unselect all the attributes by clicking on All
and None buttons. When you are ready to set equipment with the
selected write values, click on the button
will appear in tab title to
notify you that these attributes will not set equipments. You can
quick select/unselect all the attributes by clicking on All
and None buttons. When you are ready to set equipment with the
selected write values, click on the button  .
.
You can also modify the write value before setting equipment by
editing it in the table. If you do so, the value becomes red and an
 icon appears to warn you about the fact that you made
modifications in this snapshot (these modifications will not be
saved in database, they are just here to set equipment).
icon appears to warn you about the fact that you made
modifications in this snapshot (these modifications will not be
saved in database, they are just here to set equipment).

Figure 13: Modified snapshot
Snapshot comparison
There are 2 ways to compare snapshots:
Compare a snapshot with another one:
To do so, select a tab in Snapshot Details sub panel (Figure 12: Snapshot control panel). Click on button
 . You will
see the tab title of this attribute appear in the field
“1 st snapshot”. Select another tab and click again on
button to put this attribute tab title in the field
“2 nd snapshot”. Click then on
. You will
see the tab title of this attribute appear in the field
“1 st snapshot”. Select another tab and click again on
button to put this attribute tab title in the field
“2 nd snapshot”. Click then on  button to see the
comparison between these 2 snapshots.
button to see the
comparison between these 2 snapshots.If user wants to see only the first line of comparison, he must check filter

Else if he/she wants to see all the details of the comparison, he/she must check

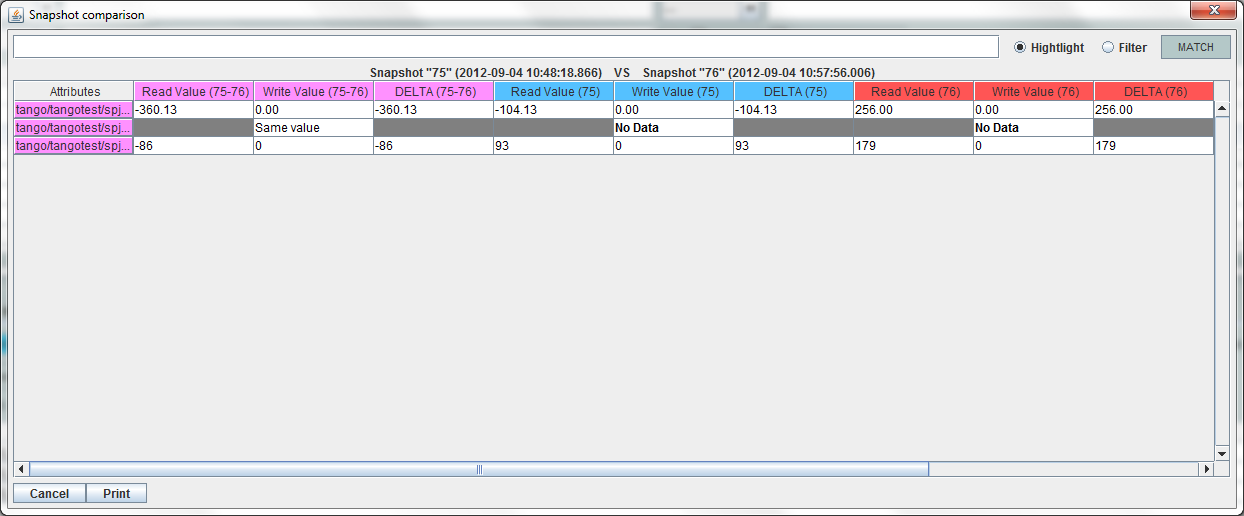
Figure 14: Snapshot comparison - full table
To print this comparison table, click on Print button.
Compare a snapshot with current state:
To compare a snapshot with current state, set this snapshot as “1 st snapshot”, as explained above, and leave the “2 nd snapshot” empty. Note that once the “1 st snapshot is selected, you only can update the “2 nd snapshot or clear the comparison selection. To do so, click on the button
 . What is hidden behind this is a creation of a
snapshot, named “BENSIKIN_AUTOMATIC_SNAPSHOT”, and you compare
this snapshot with your snapshot. Have in mind that this automatic
snapshot is registered in database. So, in the comparison table, the
current state will appear as the second snapshot with the name
“Current state” (red block in the comparison table).
. What is hidden behind this is a creation of a
snapshot, named “BENSIKIN_AUTOMATIC_SNAPSHOT”, and you compare
this snapshot with your snapshot. Have in mind that this automatic
snapshot is registered in database. So, in the comparison table, the
current state will appear as the second snapshot with the name
“Current state” (red block in the comparison table).
Snapshot Details copy
As you can see in Figure 12: Snapshot control panel,
snapshots are detailed in a table. You can copy this table to clipboard as a
text-CSV formatted table by clicking on  or
or 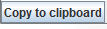 button. If you want to see this text result and may be filter it
(like removing lines), click on
button. If you want to see this text result and may be filter it
(like removing lines), click on  button. You will see the
text appear in a dialog.
button. You will see the
text appear in a dialog.
Figure 15: Snapshot edit clipboard dialog
Modifying a snapshot comment
Once your snapshot details are loaded, click on  button to
modify its comment (and save it in database or file).
button to
modify its comment (and save it in database or file).
Printing a snapshot
Once you have context ready, click on the print icon ()
and select snapshot:
The classic print dialog will then appear. Validate your print configuration to print an xml representation of your snapshot.
Saving a snapshot
Once you have context ready, click on the save icon ()
and select snapshot:
You can also go to menu Context and click on Save, or go to menu File -> Save -> Snapshot.
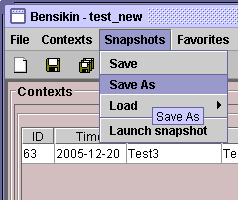
Then, the behavior is “Word-like”. This means that if this is the first time you save this snapshot, you will see the classic file browser to choose where to save your snapshot, with file name. However, if not, it will automatically save in the corresponding file. If you want to save in another file, you have to go to File menu, select Save As and click on Snapshot, or go to Snapshots menu and click on Save As.
Favorites
Bensikin manages a list of favorite context, so you can quickly switch to anyone of them. Those favorites are saved at application shutdown and loaded on startup.
Adding a context to favorites
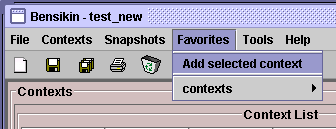
To add a context to your favorites, have your context ready by creating or loading it. Then go to Favorites menu and click on Add selected context.
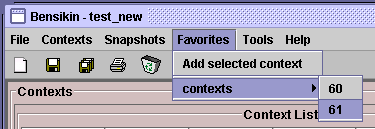
Switching to a context in favorites
To switch to a context in favorites, which means to load it from favorites, go to “Favorites” menu, select “contexts”, and click on the context you want to load.
Options
Bensikin manages global options. Those options are saved at application shutdown, and loaded on startup. The Options menu is located in the Menu bar: Tools -> Options.
Application’s history save/load Options
Define whether Bensikin has a history, i.e. a persistent state when closed/reopened.
If yes is checked, a XML History file will be saved in Bensikin’s workspace, and on next startup the current Context and Snapshot will be loaded.
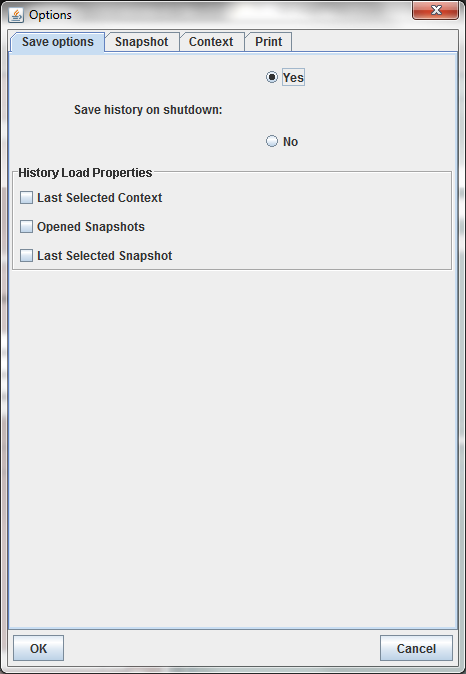
Figure 16: Save option
Snapshot Options
These are the Bensikin Snapshot Options:
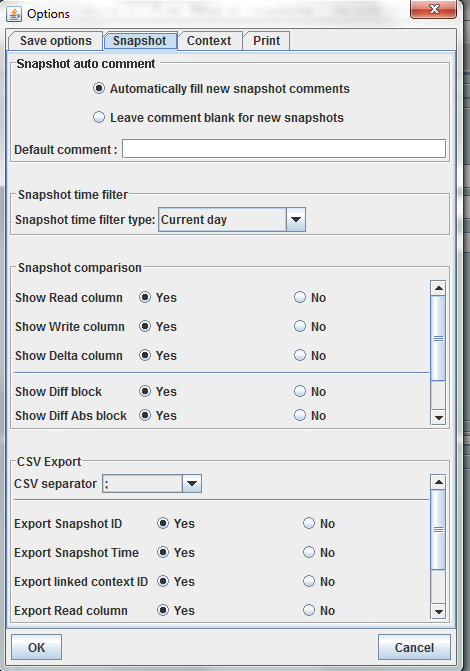
Figure 17: Snapshot options
- In the Comment Panel, you can choose to automatically set or not a
value to a new snapshot comment. This means, when you click on
button, the newly created snapshot will or will not have a
pre-defined comment.
- In the Comparison Panel, you can choose which columns you want to show/hide for every block in the Snapshot Comparison table. You can choose to show/hide the Difference block too (See Figure 14: Snapshot comparison - full table)
- In the Export Panel, you can choose the column separator for your text-CSV formatted tables (See Figure 15: Snapshot edit clipboard dialog), and which columns to export.
Context Options
Context options allow you to select which way you want to edit your contexts, see Figure 8: Option –context tab and the Creating a new snapshot section.
Print Options
The Print option allows you to print text or table in the Snapshots or in the Contexts.
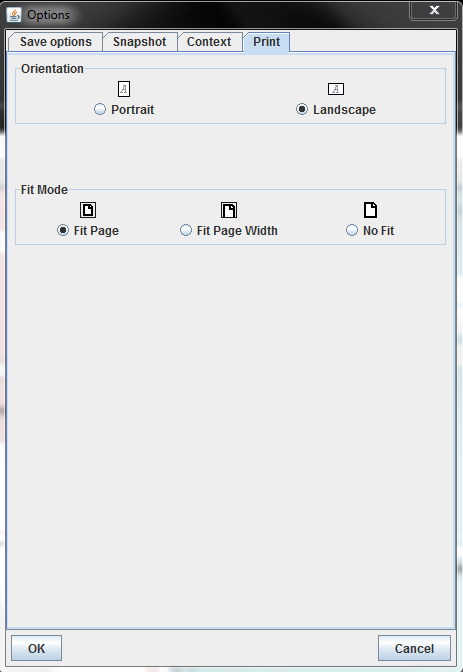
Figure 18: Print option
When you check  , you adapt the size of your print to the
size of your page.
, you adapt the size of your print to the
size of your page.
When you check  , you cut the length of your print on
several parts and the width of your print takes the width of your
page.
, you cut the length of your print on
several parts and the width of your print takes the width of your
page.
When you check  , the length and the width of your print
are cut on several parts.
, the length and the width of your print
are cut on several parts.
The Bensikin toolbar
The toolbar is located under the menu bar, and consists mainly of a set of shortcuts to often used functionalities.

Figure 19: Bensikin toolbar
- is a shortcut to creating a new Context
- is a shortcut to saving the selected Context/Snapshot into
a Context/Snapshot file
 is a shortcut to doing a saving all opened Contexts and
Snapshots
is a shortcut to doing a saving all opened Contexts and
Snapshots- is a shortcut to printing the xml representation of the
current Context/Snapshot
- is a shortcut to removing all opened Contexts and
Snapshots from display